How to Use Zoom for Online Exams
Overview of Using Zoom
Zoom is by far the most popular video conferencing software used for running online ExamTools sessions. Its many features can be quite daunting to set up and use to run an exam session. There are two basic ways Zoom is used: single- and multi-room (i.e. breakout rooms). Think of single-room sessions like small in-person VE exams with 4 or 5 VEs and a handful of candidates and multi-room sessions as what you might see at a large hamfest.
Single-Room Zoom
Many teams run small exam sessions with a half-a-dozen VEs and applicants and sequentially test one applicant at a time. This is the simplest way to use Zoom and is highly recommended for new teams to start out with. Even this single-room model has a lot of moving parts that you’ll need to master in order to run a successful VE session.
In this model, the VEs use the main room to administer the exam. All VE introductions, applicant pre-checking, testing process, etc. are done in the main room while the waiting room serves as a holding pen for applicants.
The single room model is a good starting point. As your team becomes comfortable with Zoom and ExamTools, you may want to explore the use of breakout rooms which will allow you at least the use of an additional room for testing, if you want to keep it separate from main.
Multi-Room (Breakout Rooms) Zoom
Some teams use a multi-room approach, with dozens to hundreds of VEs and applicants in a single session that still allows for a VE to applicant radio of 4:1. Multi-room Zoom is described further toward the bottom of this page.
Get a Zoom Pro Account
Zoom pricing varies from free to a couple of hundred dollars. A free Zoom account, limited to 40 minutes, is not recommended as you don’t want to rush or have your Zoom session end during an exam.
The recommended version, at least for smaller teams, is Zoom Pro. Zoom Pro meetings can have up to 100 participants and meetings are not time-limited. Per FCC Rule §97.527 use of Zoom to run your exam sessions is considered one of the “out-of-pocket expenses incurred in preparing, processing, administering, or coordinating an examination for an amateur operator license.” You’ll just need to make sure to comply with your VEC’s policy for retaining fees and will likely have to prorate your recovery of the Zoom cost over several applicants and/or sessions.
Your single Zoom Pro license only permits one meeting at a time. In practice this should be fine if you are the team lead. Only you need to pay for the Zoom Pro license. Your VEs and candidates are guests and do not pay.
Establish a non-Zoom means of communicating among VEs
We strongly recommend against using Zoom Chat for VEs to chat amongst themselves. Find another (free) chat tool such as Slack, Discord, Google Chat, Hamshack Hotline (IP Phone), etc. There is a risk that the VEs will chat with the applicant by mistake.
Zoom Account Settings
Zoom has a large number of optional settings – and they keep changing as Zoom continuously develops new features. Following are some recommended settings for a single-room session. Note that you set these at https://zoom.us – not in the Zoom desktop app.
Personal/Profile
Personal/Profile settings:
You can make your display name different from your first/last name. For example, put your first name and call sign in your display name.
Consider setting an appropriate profile photo. This will be displayed when you turn your camera off. Leaving it blank will show your display name. The admin of the Zoom account can disable to ability to display profile photos, if desired.
Other personal profile settings include your time zone and confirm that it is correct.
Personal/Settings
In Personal/Settings set these:
Security:
Waiting Room enabled.
Waiting Room Options: Everyone will go in the waiting room.
Waiting Room Options: Customize waiting room and add some help text for people in the waiting room. Something like this:
Your session host will let you in shortly. If there is a problem, text (123) 456-7890 or email ve@example.com.Embed passcode in invite link for one-click join enabled.
Host Key You can also turn off your waiting room in order to use a Host Key to claim Zoom Host. Then enable to waiting room. This allows VEs and maybe even applicants to join the meeting before the host arrives. One of the admin VEs or alternate lead can claim host and start to get organized. This best models the parking lot before the exam where you are waiting for the person with the keys to arrive to unlock the door.
Video in Waiting Room: Some teams now play a video for the applicants to watch while in the waiting room.
In Meeting (Basic):
Chat enabled. (See more about pros and cons of enabling chat, below.)
Sound notification when someone joins or leaves – Play sound for everyone. Or disable it.
Co-host enabled.
Screen sharing enabled.
Who can share? All Participants.
Allow removed participants to rejoin enabled.
Allow participants to rename themselves enabled.
Create a Zoom Session
In Personal/Meetings settings click Schedule a Meeting and set these:
Select
Recurring meetingwithRecurrence: no fixed time.Set a pass code.
Enable Waiting Room.
Video off for host and participant. This is the initial value. We want no surprises when some connects from the waiting room.
Meeting options:
Allow participants to join anytimeandMute participants upon entry.
Running the Exam Session with Zoom
Log in to the desktop Zoom app and start the session you defined above.
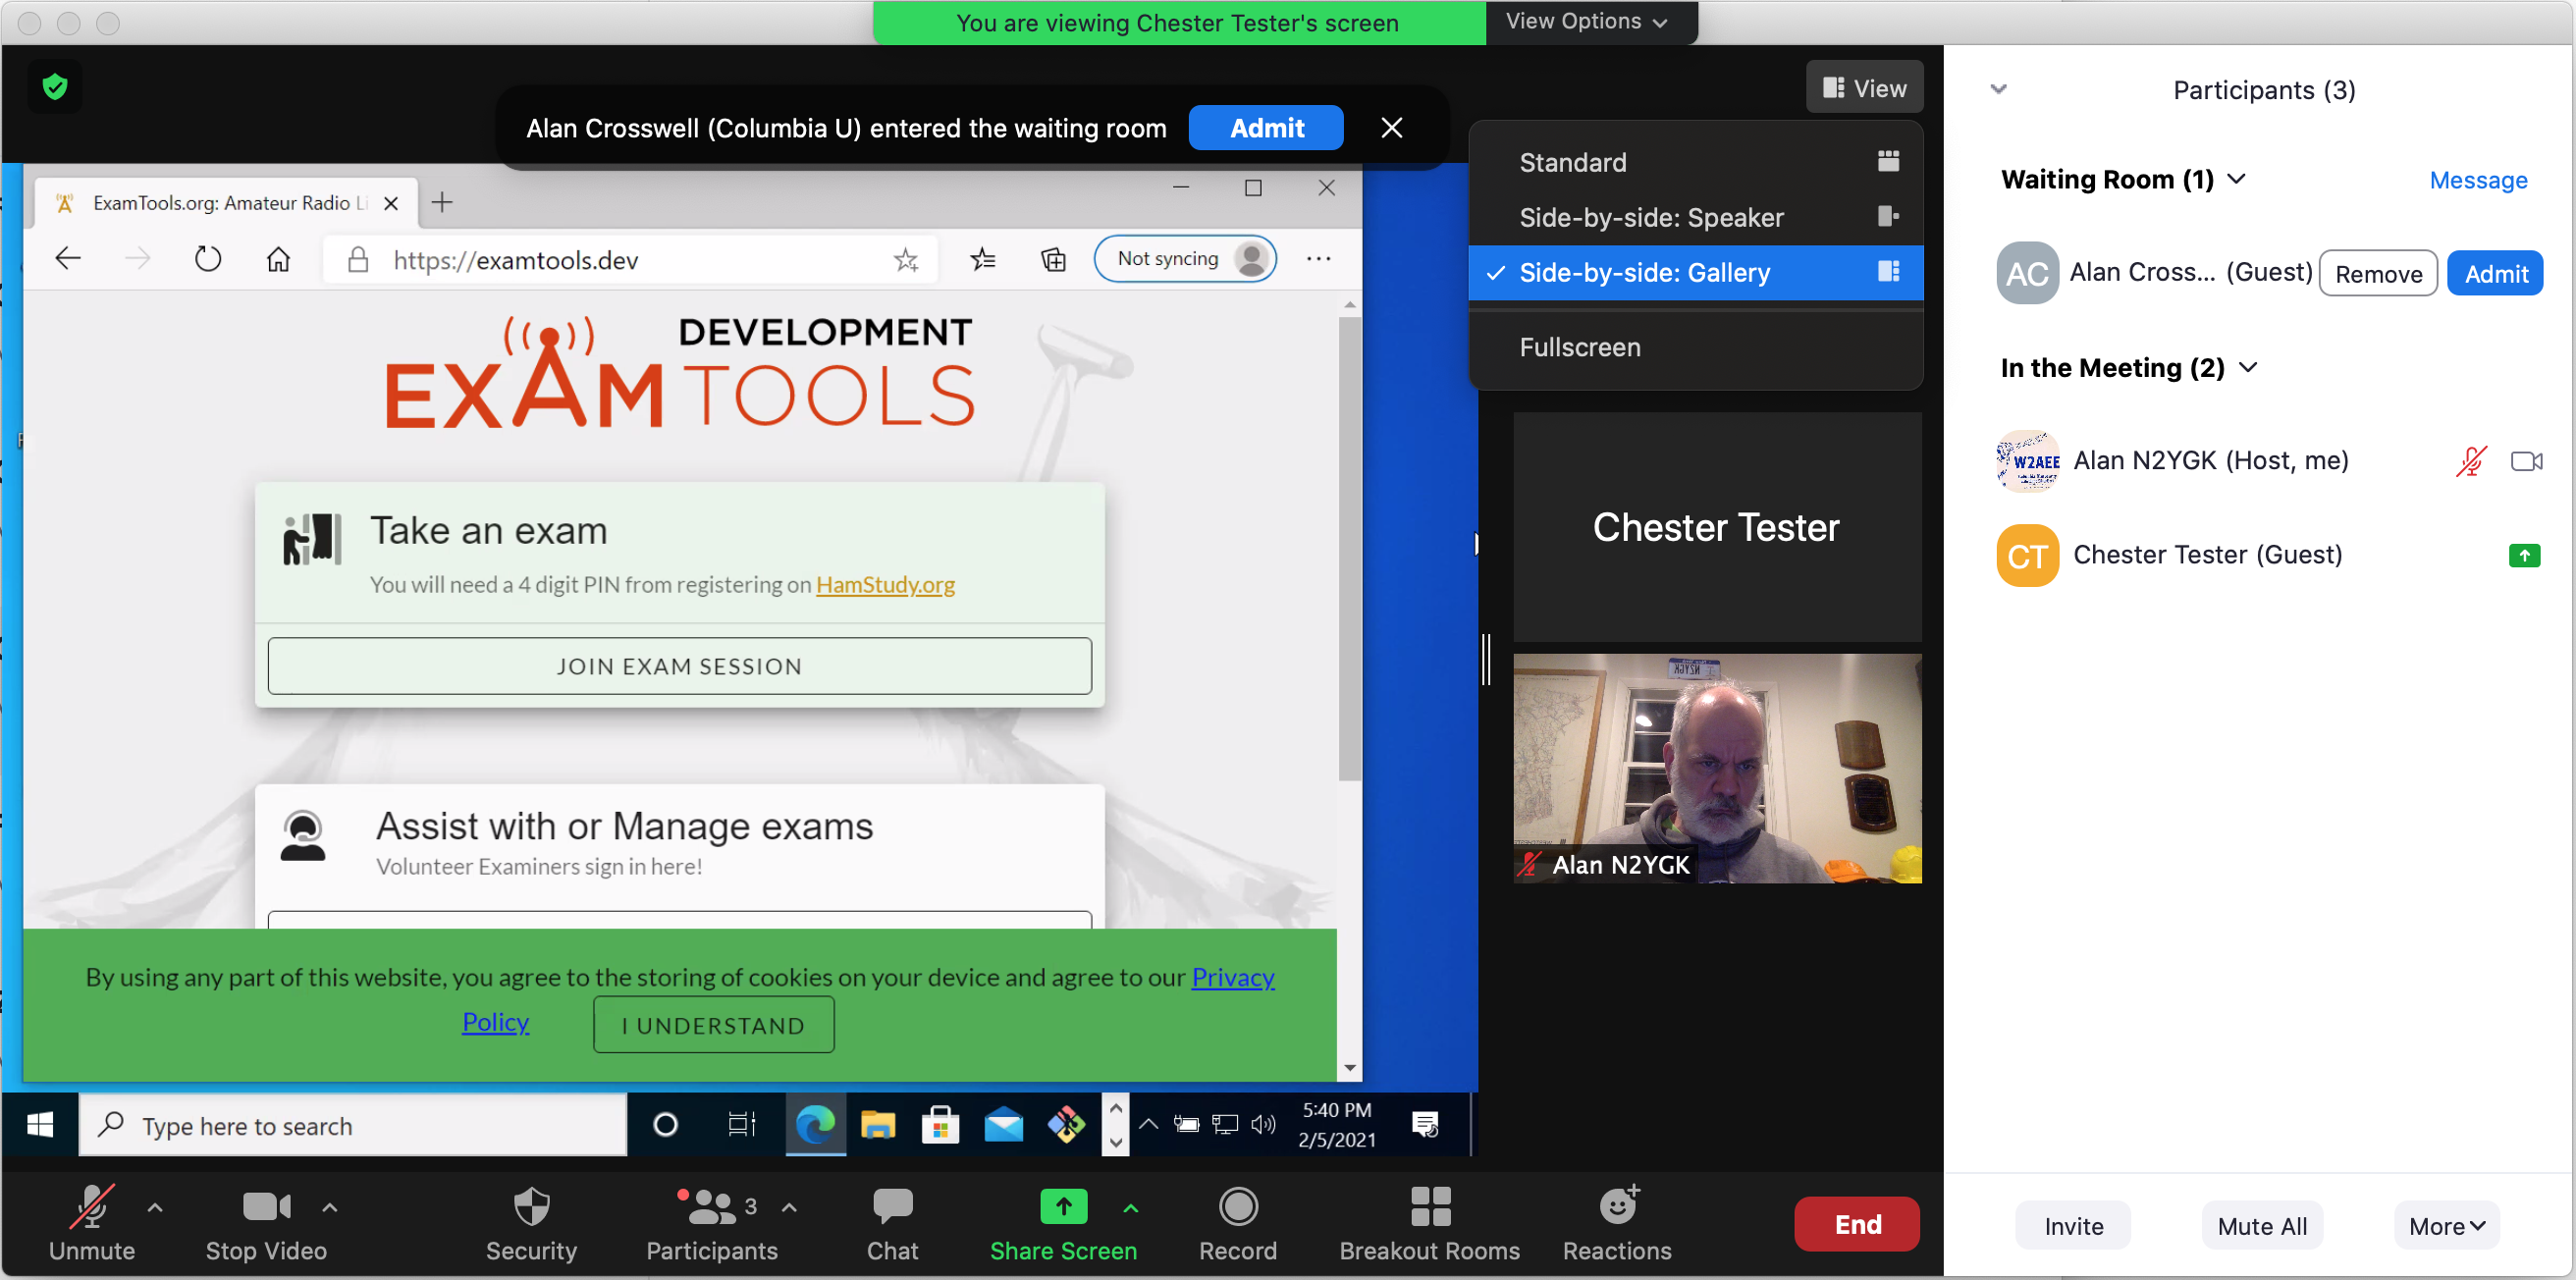
Click on the Participants button which will bring up the Participant list on the right-hand side.

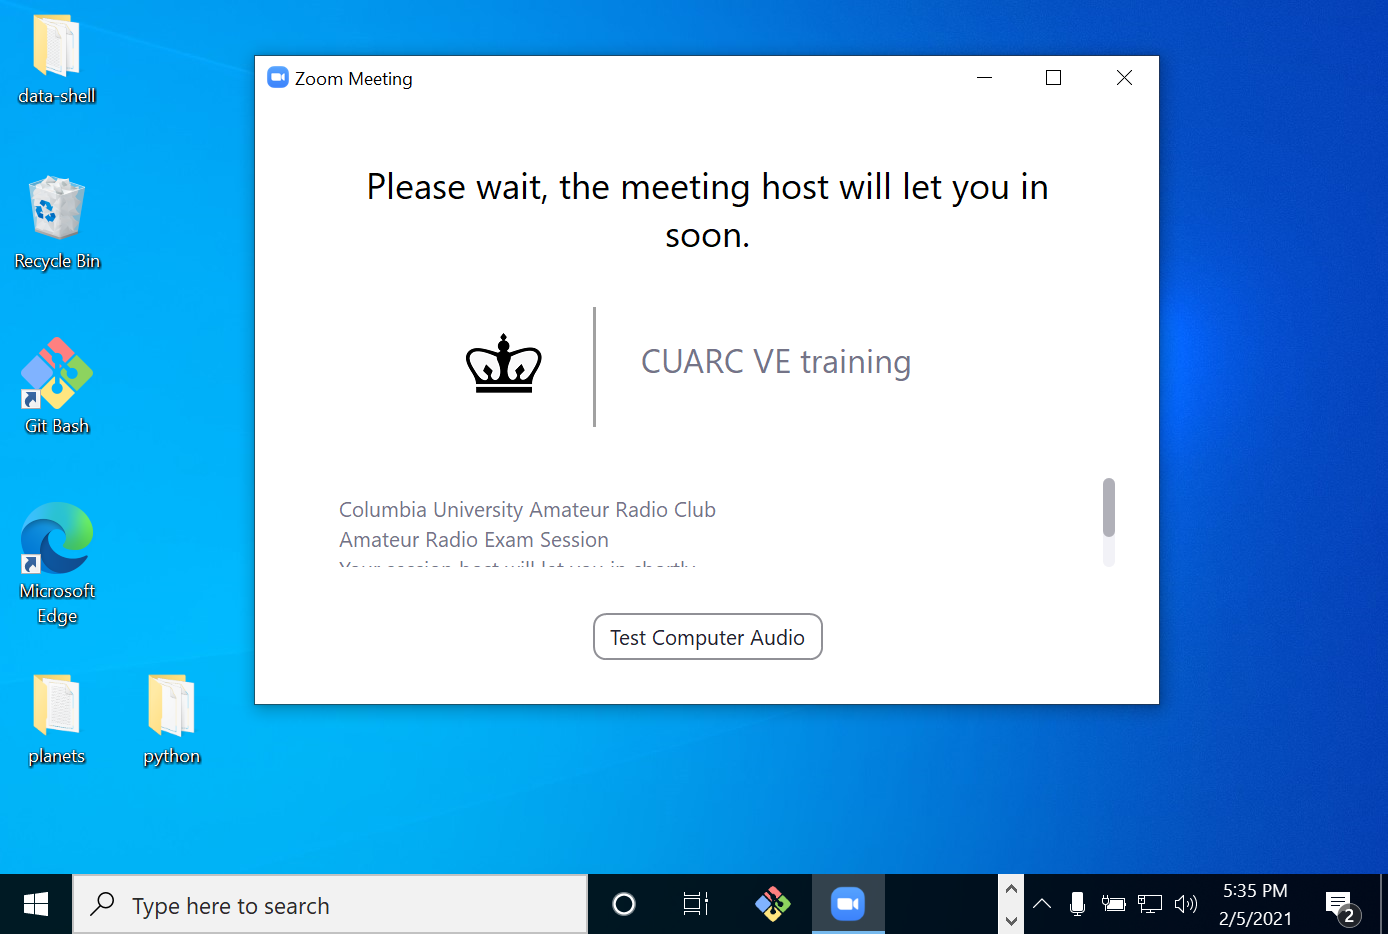
Wait for your VEs and applicants to start showing up. Since you’ve allowed “join before host”, they may already be there in the waiting room (or in main if you have turned off your waiting room and are using a Host Key). This is what the waiting room looks like when it’s been customized with a text message and icon image:
One-by-one admit your VEs from the Waiting Room. Be aware that the waiting room only displays a small number of names. You may have to scroll up and down.
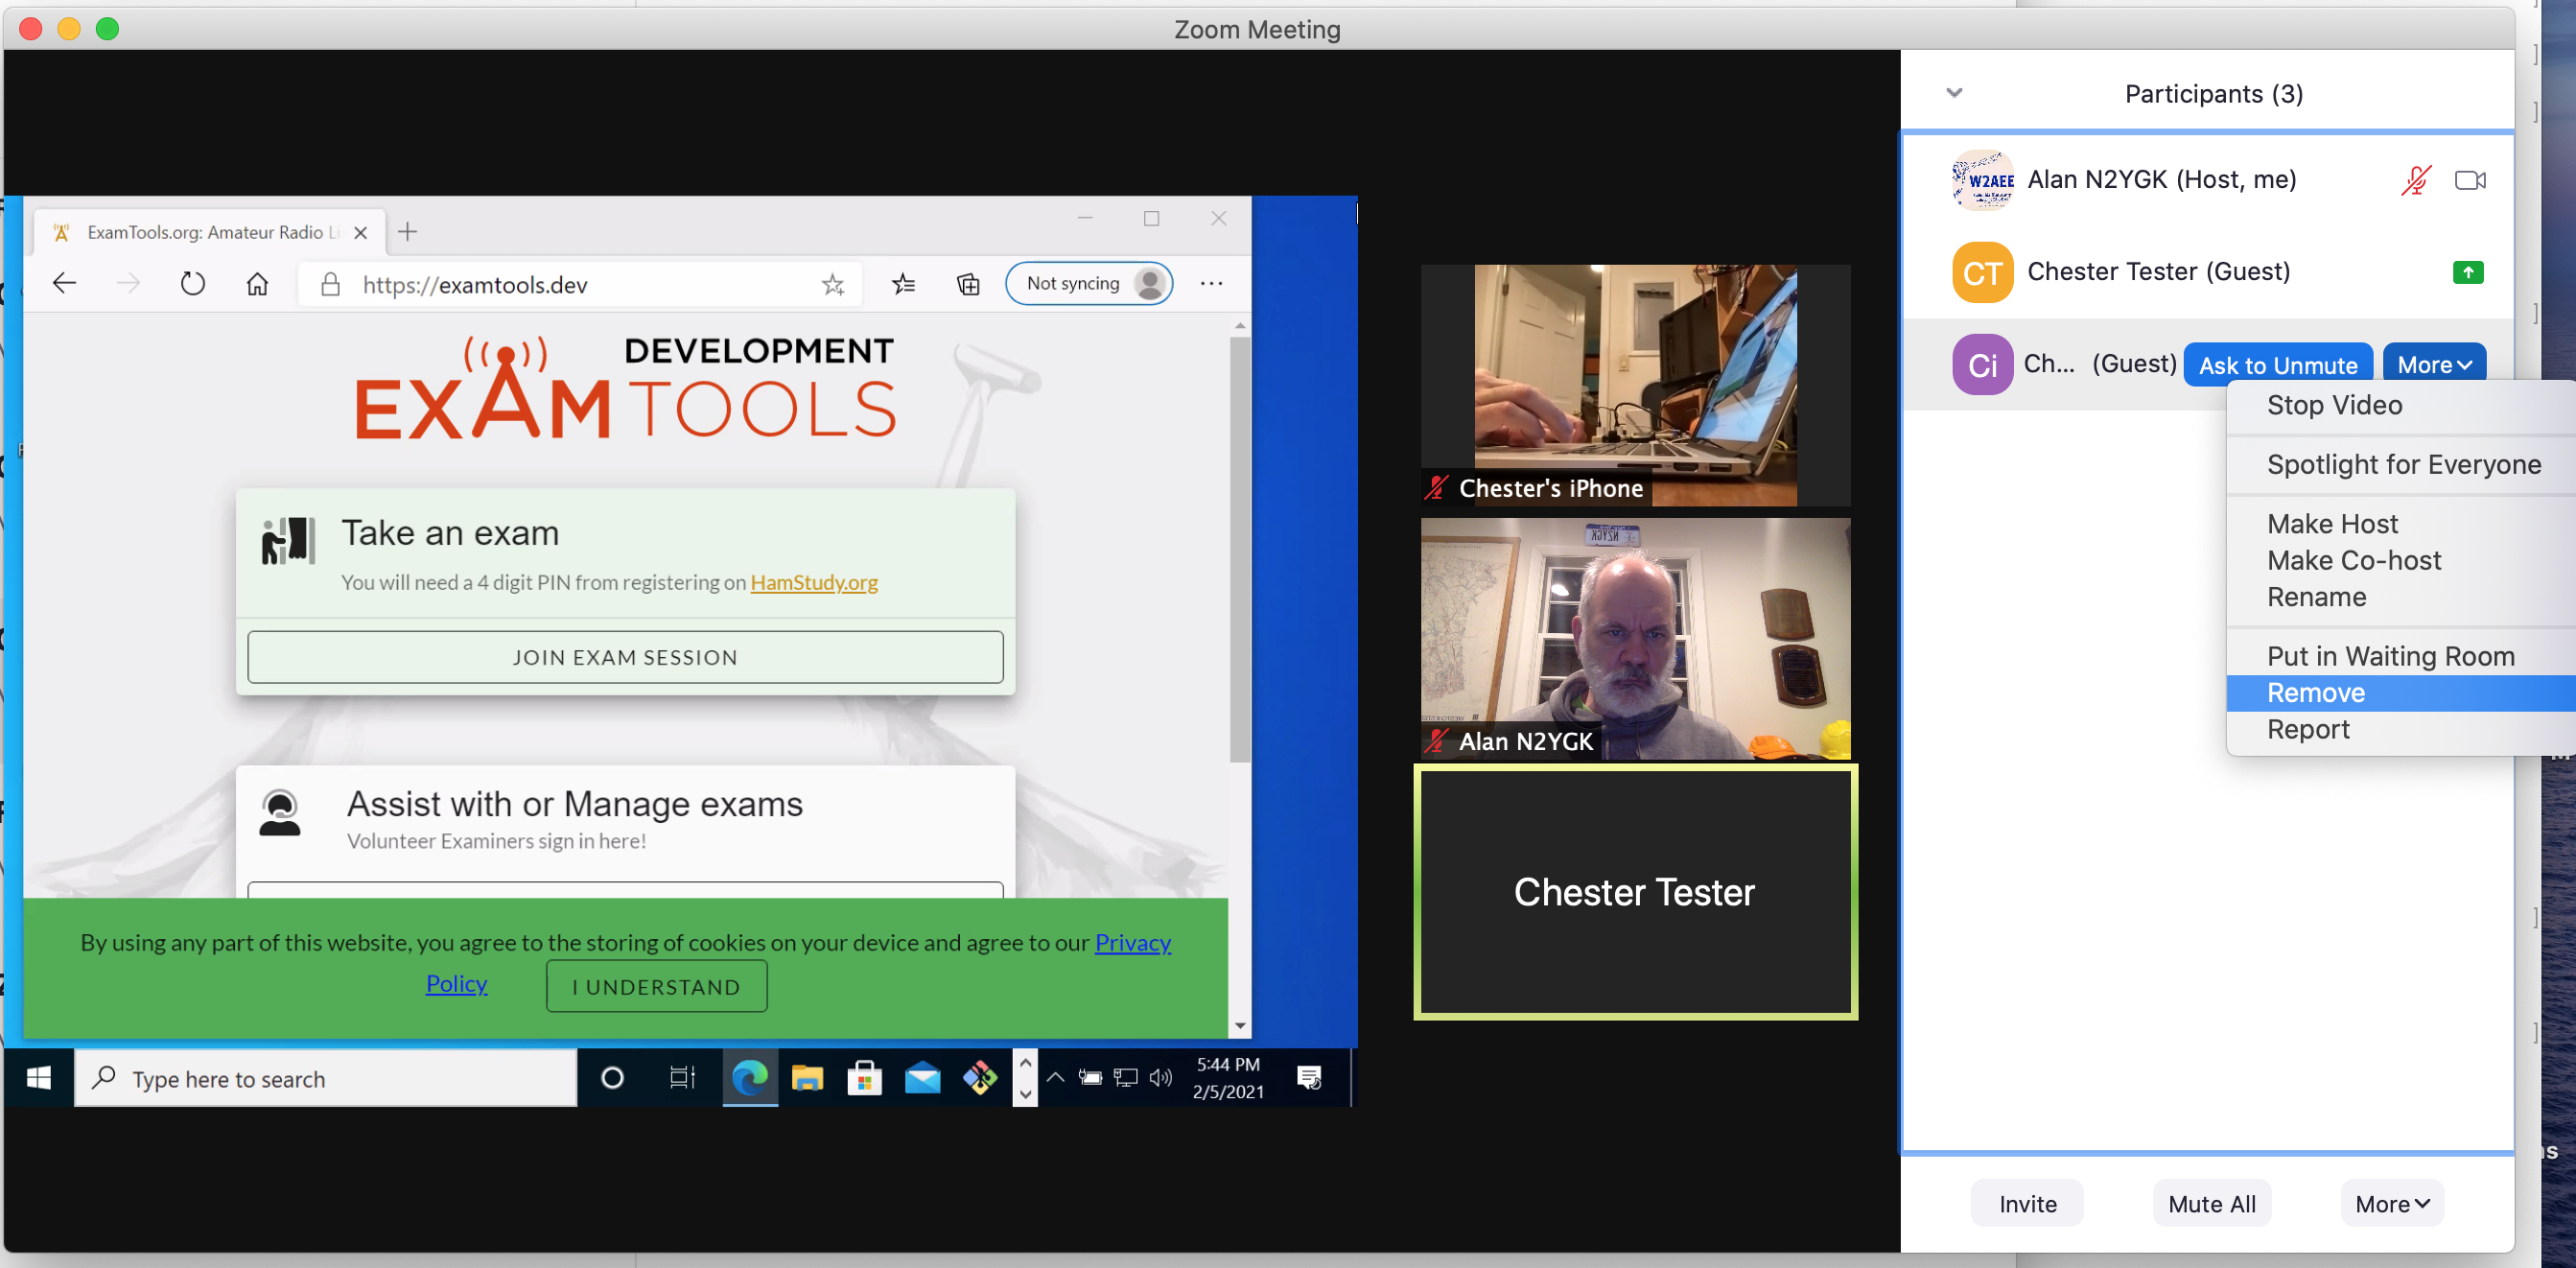
Designate one or two as co-hosts by clicking on their name and selecting the Make Co-Host option. Think of a co-host as Alternate NCS in case your Zoom session fails. You can alternatively make all of the VEs or just room leads Co-Hosts. If a VE is not a co-host, you will need to move them. Otherwise, as a co-host, they can move themselves
Make sure all your VEs have a good video presence and background – either real or using a Zoom Virtual Background. We want our applicants to experience a friendly, positive, apolitical image of our VE team, our VEC, and the Amateur Radio Service. VEs enter their Zoom display name to include their call sign (or you can do it for them). Let them try to change it themselves. Many want to learn and don’t really appreciate being moved around and being renamed in Zoom.
Once all your VEs are present, admit your first applicant. Make sure to set Side-by-Side Gallery mode so you can see all the VE and applicant video angles.
After introductions, checking candidate ID, and so on, have the applicant share their complete desktop, make sure you are ready to start the exam, and then have them enter http://exam.tools in their browser. Depending on the number of VEs, you may need to slide the bar between the shared desktop and video windows so as to see all the video views.

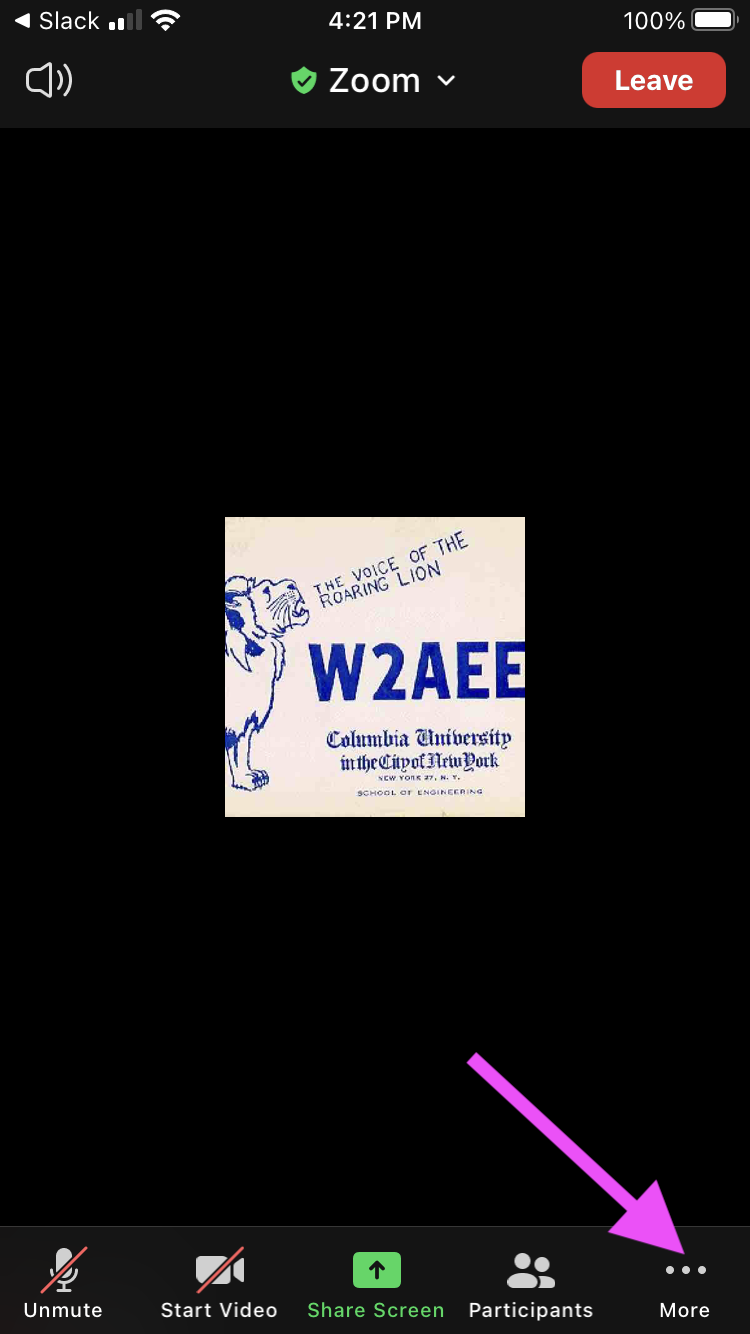
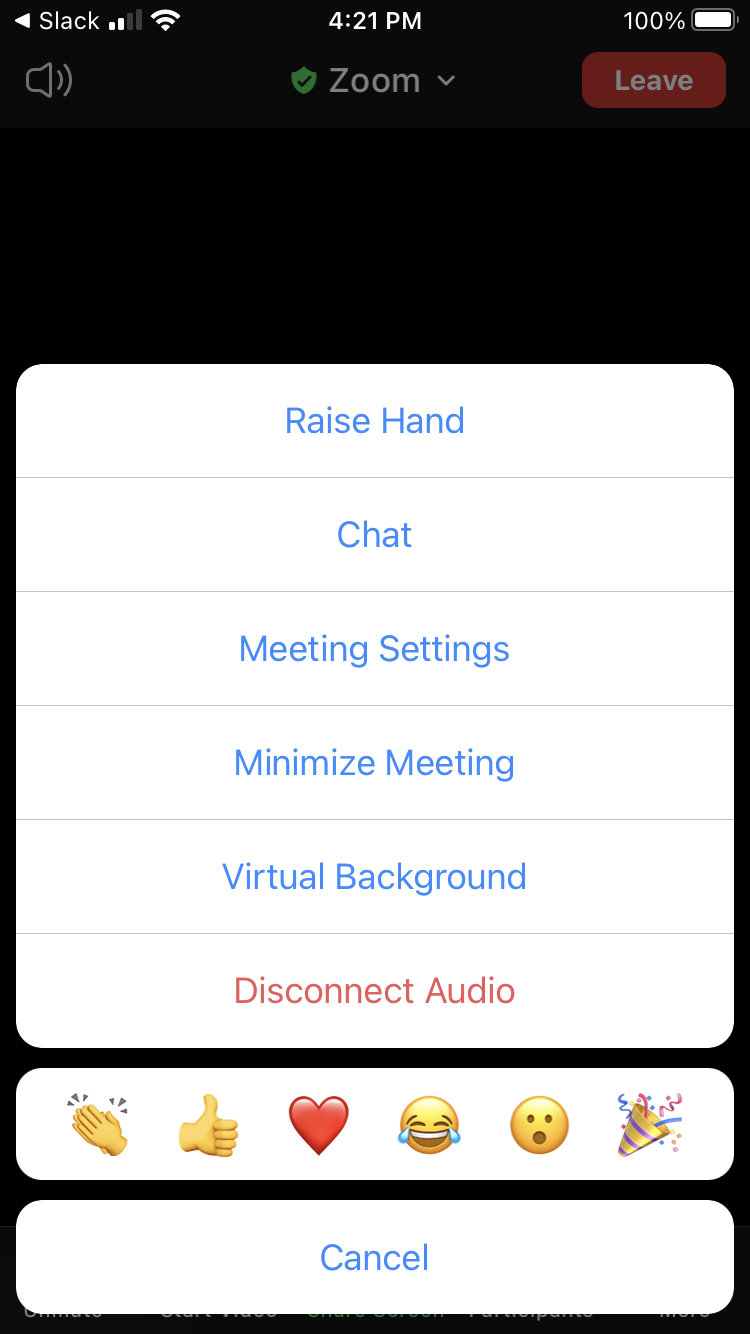
If your team requires or needs two devices (cameras), the candidate joins the second device with audio not connected. Otherwise you will likely get audio feedback from the speaker of the second device to the microphone of the applicant’s main computer. In Zoom for iOS (and likely other versions) have the applicant click on
... Morenear the bottom right and thenDisconnect Audio. See screenshots, below.Before you approve the applicant to start their exam, have all the VEs mute their audio and either turn off their video or leave it on depending on your team. The applicant’s audio and video should always be kept on. The applicant should be in view at all times. If they drift out of view, the lead should ask the applicant to adjust their camera. Generally, all VEs should be visible and videos should all come back on before exam is graded.
Breakout Rooms
When you are ready to run a larger session, breakout rooms will allow you to run multiple exams at the same time in different rooms. It highly recommended that you have someone who is very familiar with how Zoom breakout rooms work to assist you with your exams in the beginning. The VEs will need to be trained as well unless they are coming from other teams who use breakout rooms. You can either invite VEs and applicants to join rooms or make some or all of them co-hosts. The applicants will always be invited or moved to a breakout room, but co-hosts can move themselves. They also can close all the breakout rooms. The red button should be discussed and everyone be told not to press it. Even if you do not want to run multiple exams at the same time, this feature would allow a team to run exams in another room which would leave main free to bring applicants in from the waiting room to prep for the exam and provide a location to visit with completed applicants.
Tips and Tricks
You will invariably run into some issues. Here is the (beginning of) a list of Tips and Tricks:
Zoom Chat
Use Zoom chat only to send messages to Everybody which includes all the VEs and the current applicant. This can be
useful if, for example, the applicant is unable to hear you. Do not use Zoom chat to talk among the VEs – this can
be distracting to the applicant. Some teams disable Zoom Chat to prevent this.
You can also use Zoom Chat to send a message to Everybody in the Waiting Room. You can use this to drop in
helpful status updates if your session is running behind schedule, for instance. Be careful when you send these messages
as:
everyone in the waiting room will receive the message. Avoid sharing applicant names, etc.
you might inadvertently send the message to everyone in the meeting instead.
Unknown Person in the Waiting Room
While in the Waiting Room, a person is unable to change their display name, but you can rename them if you figure it out. If you aren’t sure, then you’ll need to admit them and see who they are. They can’t fix it until they’ve been admitted to the main room.
Wrong person admitted from the Waiting Room
You can send them back to the Waiting Room by selecting Put in Waiting Room.
Applicant has difficulty or forgets to leave Zoom session
You can remove the applicant but make sure to uncheck the box to Report to Zoom – that’s for reporting Zoom bombers
and other inappropriate behavior. You can alternatively just put them back in the waiting room.
PC Camera is too blurry to read photo ID
Frequently desktop/laptop cameras don’t focus well on photo IDs. Try using a second device (phone) camera. Having a second camera can be helpful, even if it isn’t required, for room scans, IDs, and just feeling comfortable testing an applicant in a challenging environment. Most people who have a laptop computer with a camera also own a Zoom-capable phone.
Zoom Second Device Audio Feedback
When using a second device (usually a phone), applicants frequently connect audio, which leads to audio feedback
from the speaker of the phone into the microphone of the main computer. Have the applicant click on ... More
near the bottom right and then Disconnect Audio.
Recording with Zoom
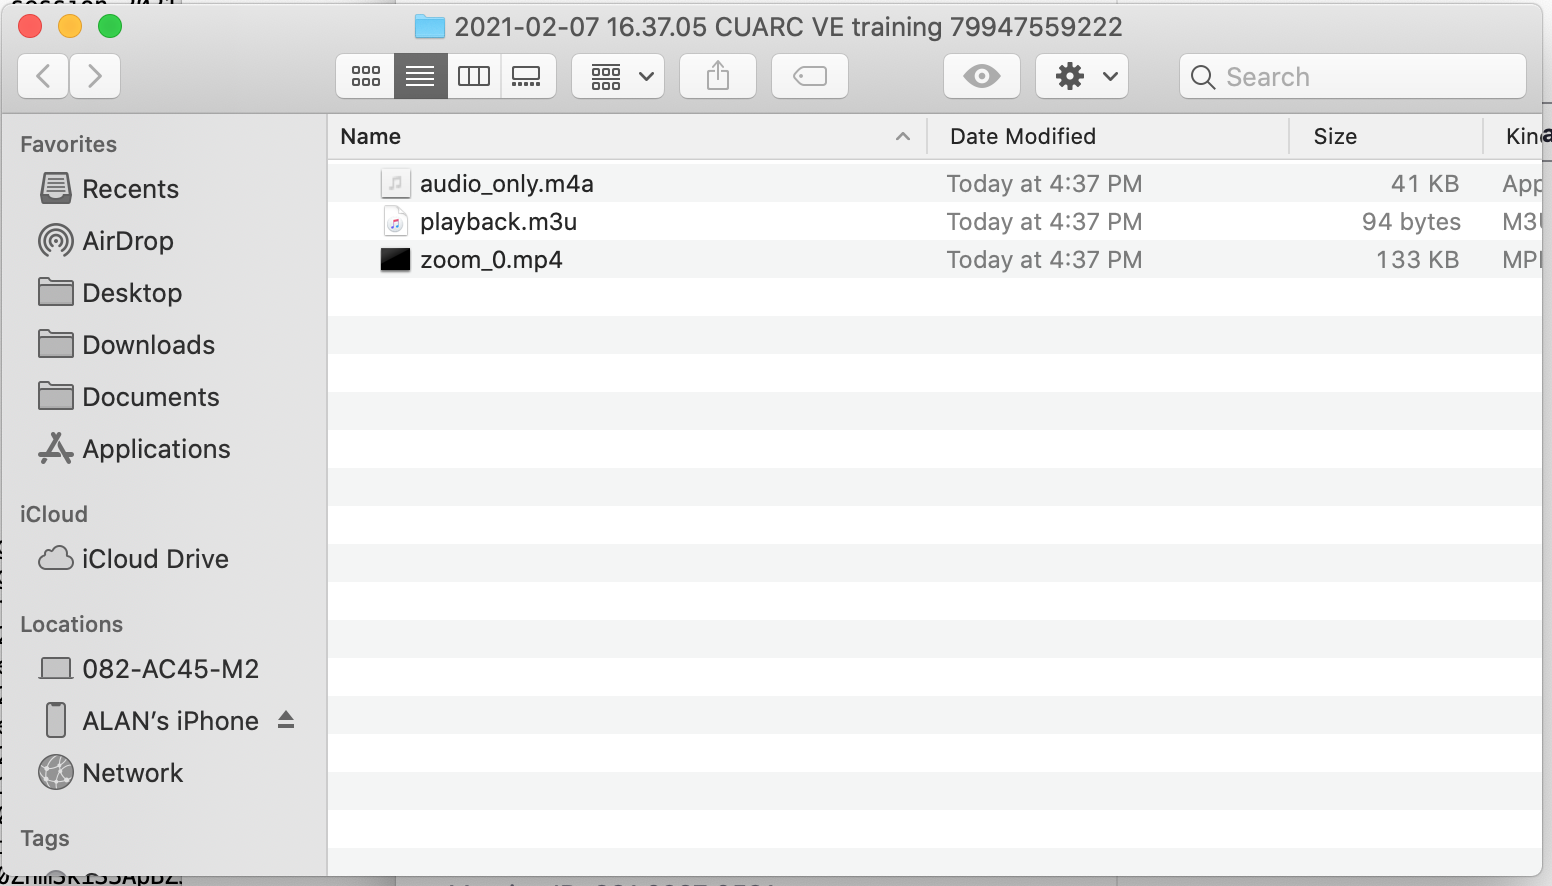
The ARRL/VEC and others have asked that we not record candidate sessions. If you choose to record, be certain to never record personally-identifiable information (PII) such as photo ID and only record if the applicant has given explicit permission to do so. If you need to record, you have the option of pausing or stopping the video. The paused video recording will result in one mp4 file. If you stop and start recording, then you’ll get multiple mp4 files.
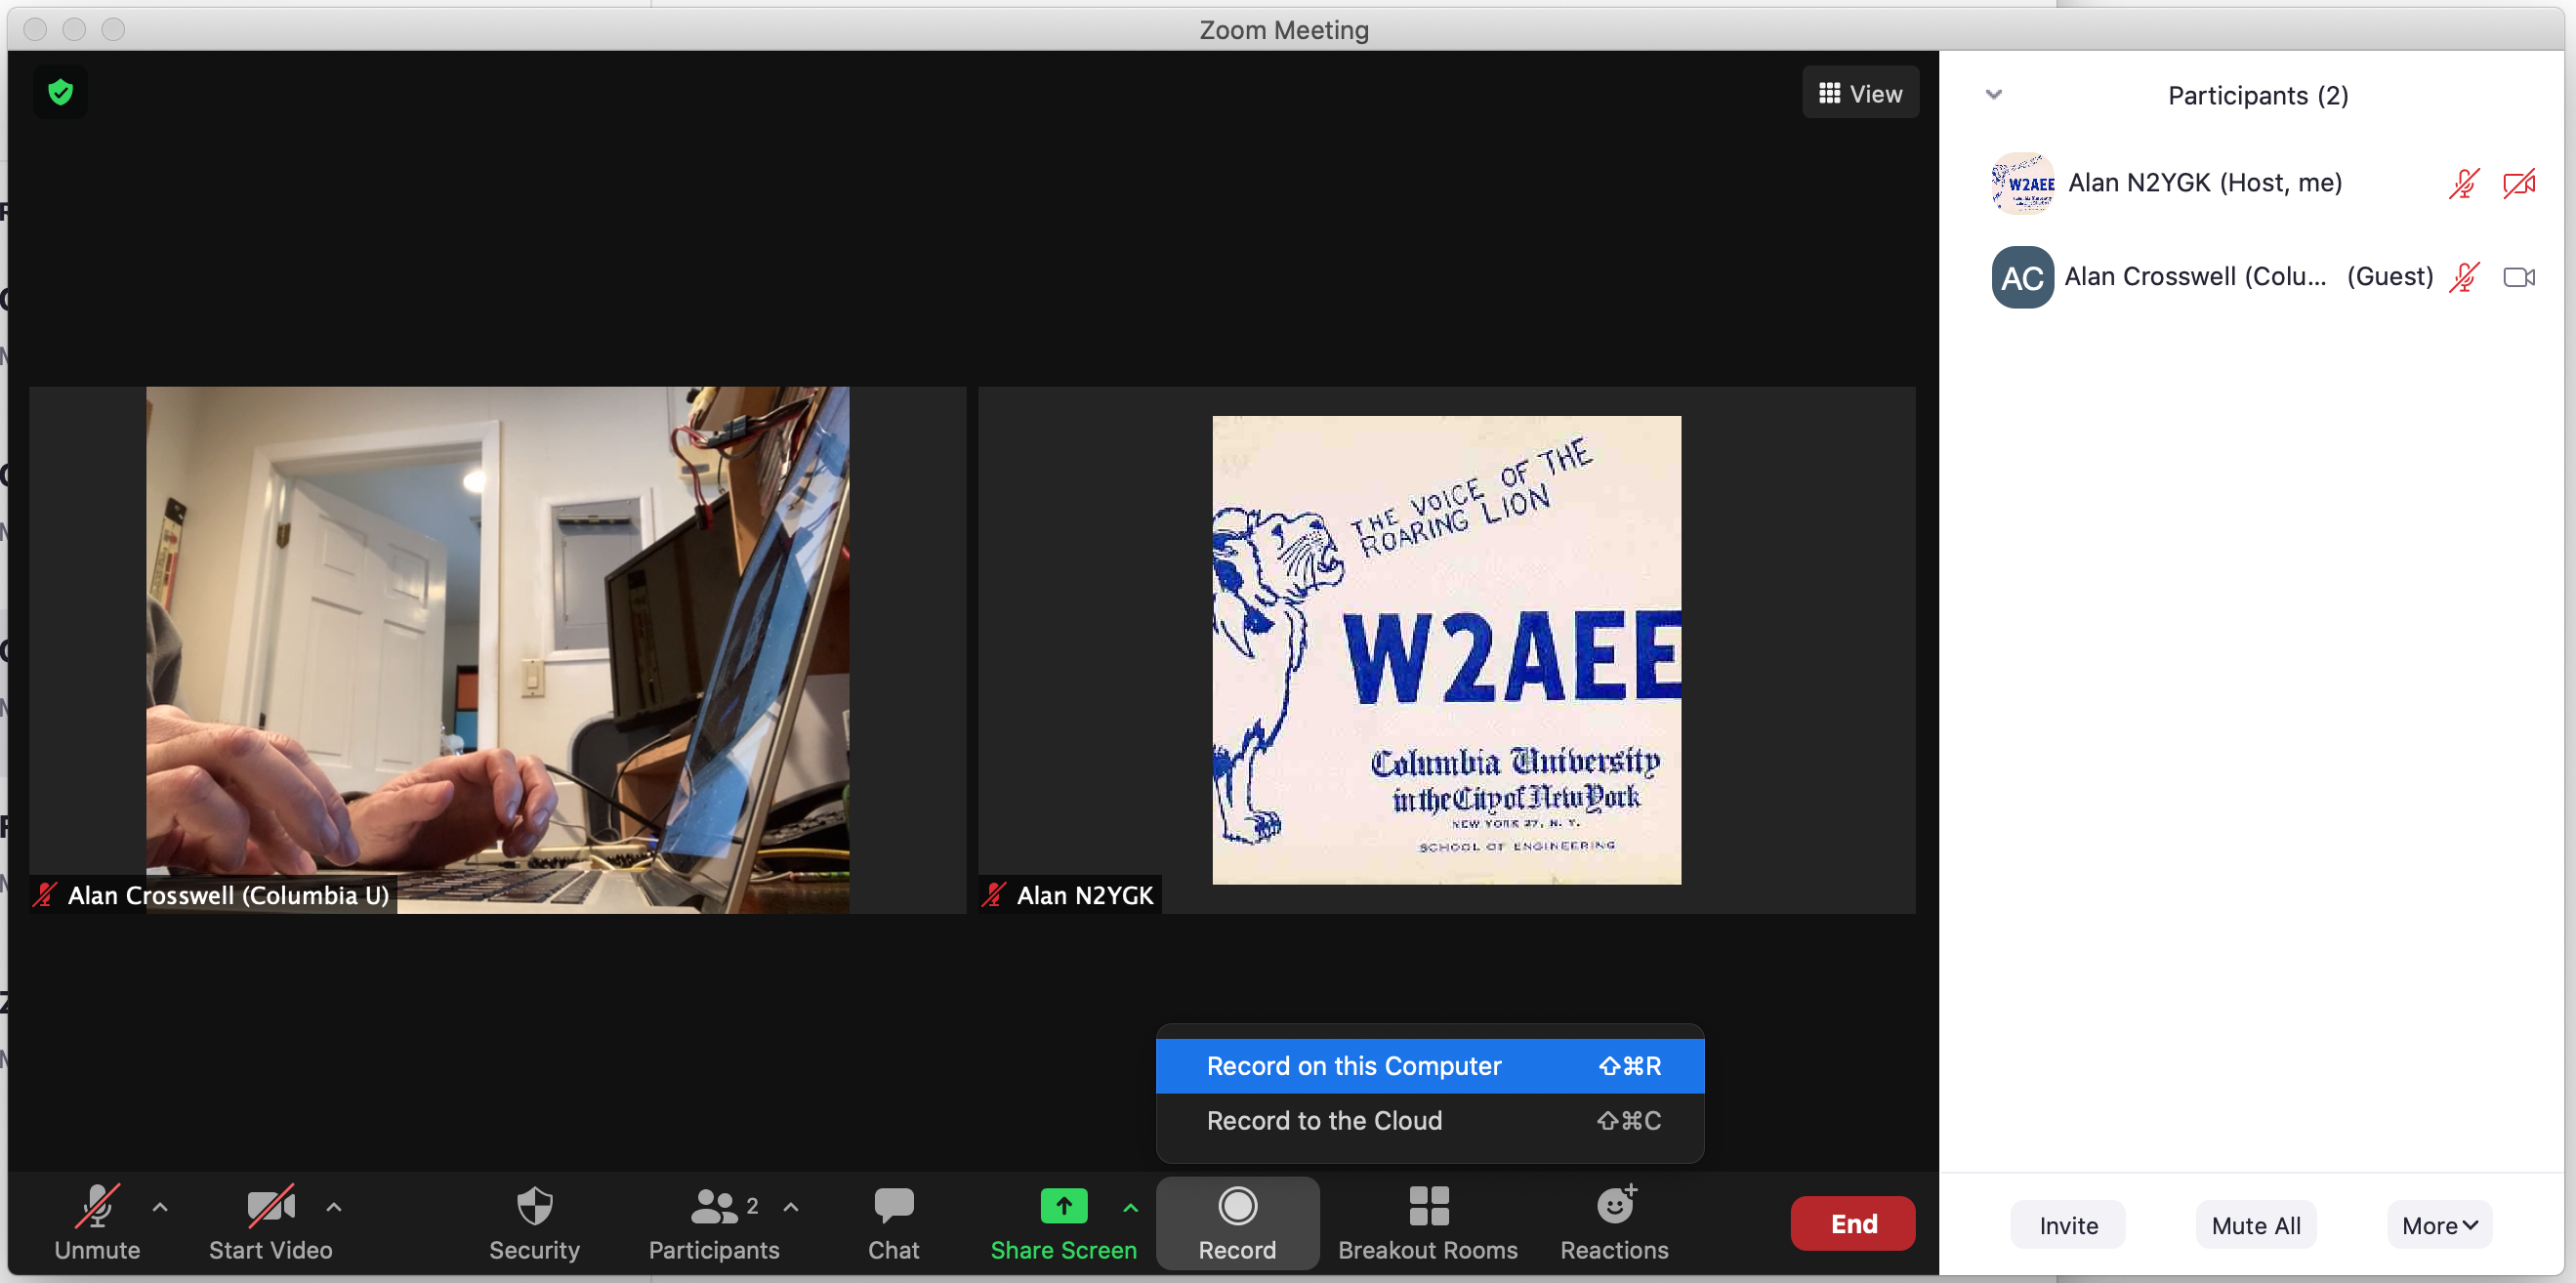
When the Zoom meeting ends or the participant who recorded exits, Zoom will start rendering the saved video into an mp4 file. When it’s done, a file browser will pop up with several files offered. You might only want to retain the mp4 file. You can upload and store the rendered recorded video to Google Drive (mp4’s do not count against your storage quota) or your favorite cloud storage (i.e. Drop Box).